Static pressure and flow
Pressure at rest and gallons per minute actually available at the meter. This single pair of numbers sets how many heads can share a valve. Everything downstream is constrained by it.
550 Reserve St., Southlake, TX · hello@sundayirrigators.com
Service · 02
Anyone can put pipe in the ground. What decides whether a system waters a property evenly for fifteen years is arithmetic done before the first trench: how much water the meter can actually deliver, how fast this soil accepts it, and which parts of the property have nothing in common with each other.
Design inputs
Eight measurements decide the whole system. Get them wrong and no amount of good installation work will save it — you end up with a system that runs beautifully and waters unevenly. We take all eight before anything is drawn.
Pressure at rest and gallons per minute actually available at the meter. This single pair of numbers sets how many heads can share a valve. Everything downstream is constrained by it.
How quickly this ground accepts water before it starts running off. On North Texas clay the answer is: slowly. That dictates cycle-and-soak scheduling, not just total run time.
A shaded north bed and a west-facing slope have opposite water needs and cannot share a valve. Slope also changes application rate, because water that runs off is water that never counted.
Turf, shrub beds and established trees want different volumes on different intervals. Zoning by plant type is the difference between a healthy landscape and one that is permanently compromised.
Drives, walks, patios and pool decks define every arc on the plan. Overspray is water you paid for landing on concrete, plus staining and, in winter, ice where people walk.
The steady south wind through a North Texas summer moves fine spray off target. Head spacing and nozzle droplet size are chosen with that in mind rather than from a catalogue default.
The required backflow assembly, its installation height and its testing schedule are set by the city and the water source. Permitting and plan requirements are confirmed before design is finalised.
Where the valve boxes sit, how the wire is routed and whether a person can reach a solenoid in five years. Serviceability is a design decision made at the drawing stage or never.
The plan
An overhead plan for a typical lot. Water leaves the meter, passes the backflow assembly, and runs a pressurized mainline to manifolds placed where they can be reached. From there each zone serves one kind of area, with one kind of head, at one application rate.
Turf, beds and a narrow strip beside a drive have nothing in common. Separate valves, separate head types, separate schedules — and a mainline routed so the manifolds can be opened without lifting a patio. Mainline and lateral cover depths are set to local code and typical practice, with rigid sleeves anywhere pipe crosses hardscape.
Materials & method
Most of the cost difference between two irrigation bids is buried within a week of installation and invisible for years. Depth, sleeving, swing joints, wire gauge and splice quality do not show up in a demonstration on handover day — they show up in year six, when a mower catches a head or a driveway needs a line pulled under it.
Figures below are typical practice for this region and are confirmed against the governing city code for your property before installation.
Build sequence
Nine steps, in this order. The order matters: everything after the locate depends on knowing what is already under the ground.
Measurements taken, zones drawn, heads and nozzles specified against available flow.
The plan walked on the property with you, then painted and flagged where it will actually go.
Public utilities located before any machine starts. Private lines discussed and probed.
Mainline and laterals installed to depth, sleeves set under drives and walks first.
Valves manifolded in accessible boxes, wire run with slack loops and waterproof splices.
Bodies set to grade, arcs adjusted to hardscape edges, nozzles matched across each zone.
System charged and held, every joint checked, then flushed before final nozzles go in.
Controller programmed by zone and season, sensors verified, and the whole system run with you.
Station map, manifold locations, head types and nozzle sizes, documented for whoever comes next.
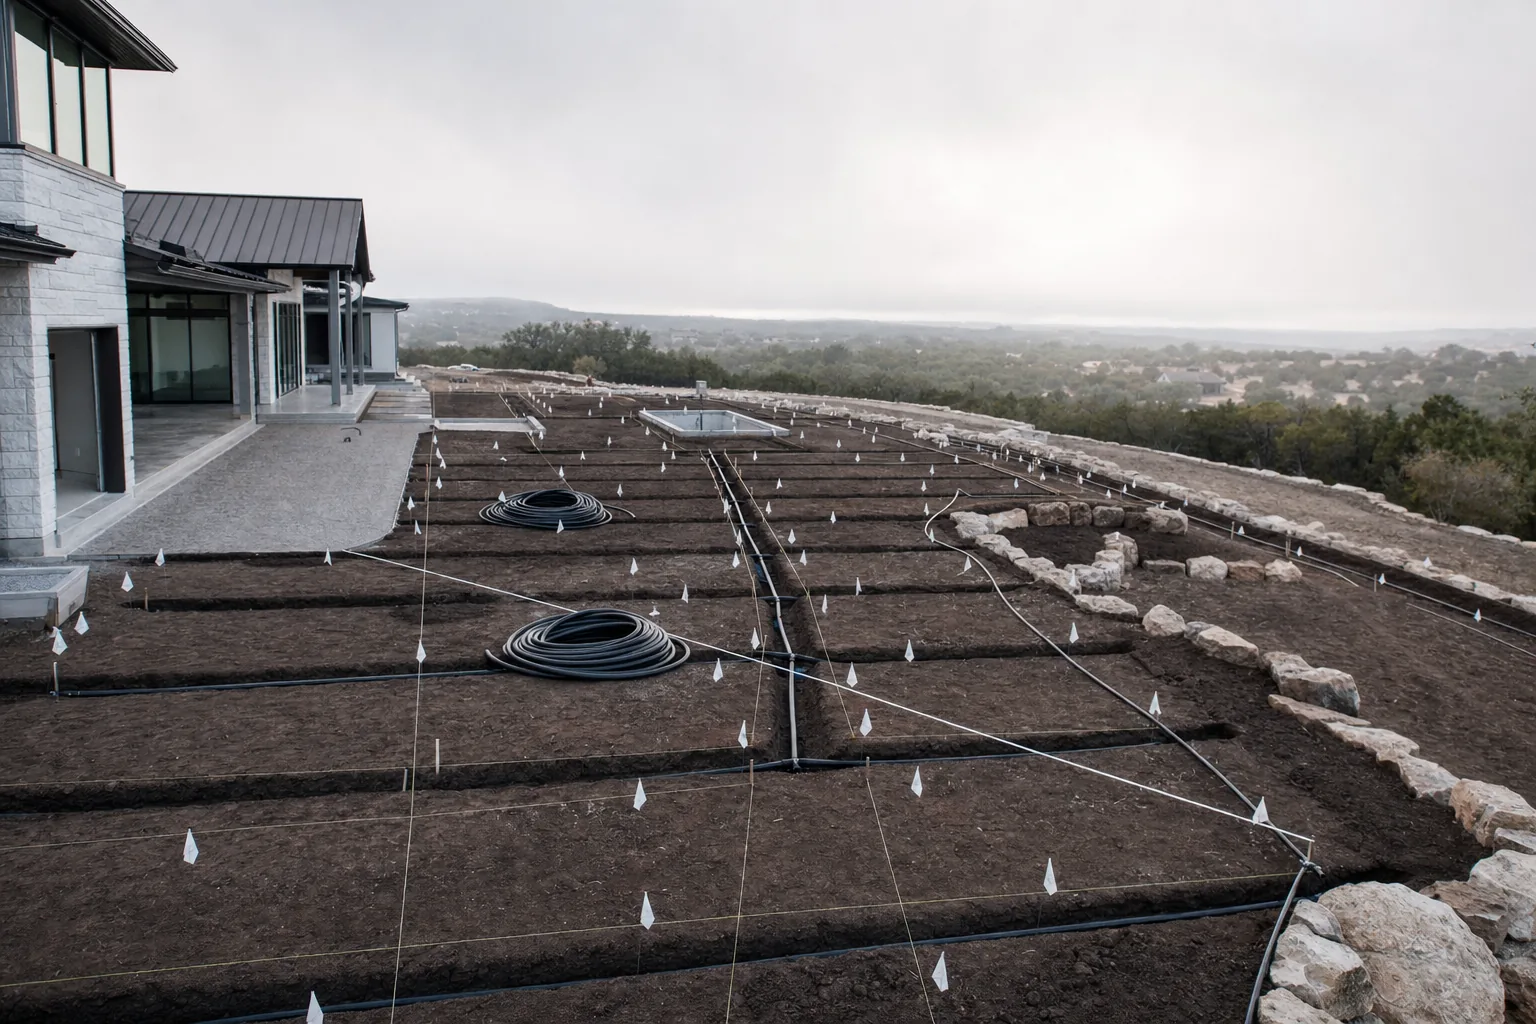 Trench lines follow the plan, not the shortest route
On site
Pipe takes the route the plan calls for: away from tree root plates, clear of future planting beds, square to the hardscape so a line can be found again later. The shortest diagonal across a lawn saves an hour on installation day and costs a day every time someone has to locate that pipe for the next twenty years.
Sleeves go in under every drive, walk and patio edge before those trenches close — oversized, capped and mapped. Adding a zone later should be a wire pull, not a saw cut through concrete.
Serviceability
Valves are the most frequently serviced component in an irrigation system, and they are routinely buried in the least convenient place on the property: under a shrub, at the back of a bed, splayed across three separate boxes because that was where the trench happened to be. Every future repair on that system starts with twenty minutes of searching.
We manifold valves together in accessible boxes, set flush to grade, with unions so a single valve can come out without cutting pipe, and wire looped with enough slack to lift the assembly clear. It costs a little more on install day and it is the reason a future repair is a short visit.
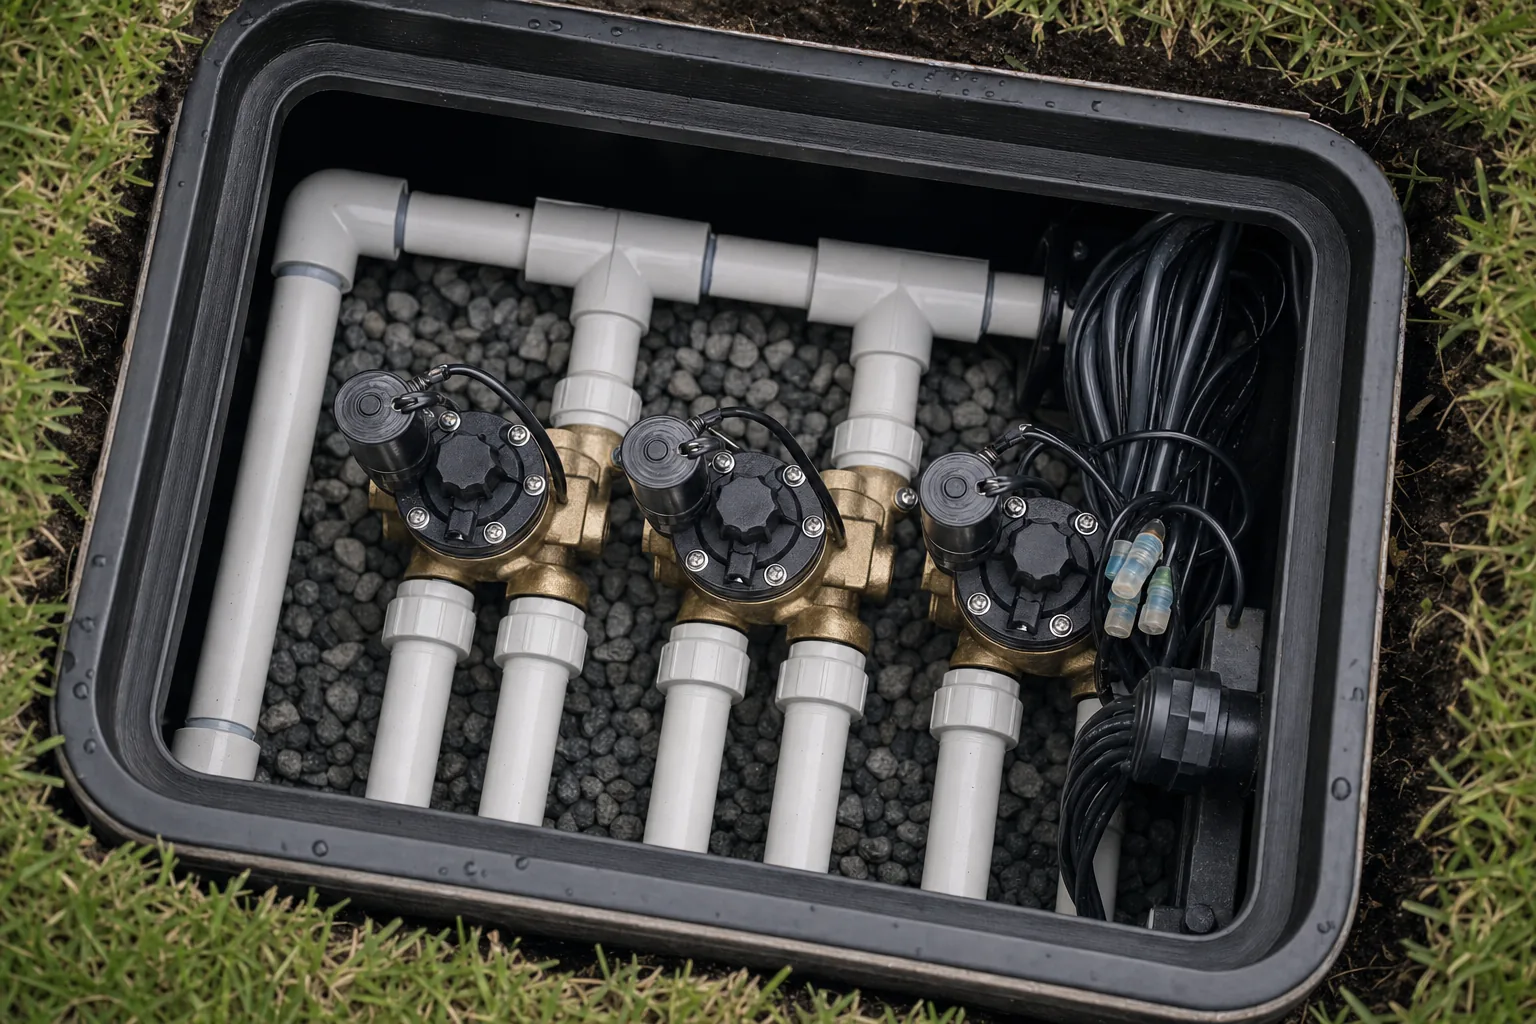 Manifolded valves, flush boxes, unions at every valve
New construction & multi-property
On new construction the irrigation plan has to coordinate with grading, drainage, hardscape and landscape schedules — and with whoever is pouring concrete next week. Sunday handles those systems as one scope, which removes the argument about who was supposed to sleeve the driveway.
Sleeving and mainline coordinated with the concrete and grading schedule.
Design built around the landscape plan rather than retrofitted after it.
Entries, medians and common areas with documented station maps.
Multiple addresses, one contact, one repeatable specification.
Because we also build the drainage, grading and fencing on the same properties, the irrigation plan is drawn knowing where water is meant to leave the site. More on how the company is organised is on the about page, or start a conversation about a portfolio of properties through contact.
Replacement
Replacing a working system is usually the wrong answer, and we will say so. But there is a point where each repair is money spent to keep a bad plan running, and it is worth naming honestly rather than discovering it after the fifth visit.
If a system is fundamentally sound and simply neglected, the better path is a diagnosis and repair followed by a maintenance rhythm. We tell you which of the two you have before you commit to either.
Turf and beds sharing valves, or sun and shade on one schedule. No repair fixes a zoning decision.
Brittle pipe that has already been repaired several times will keep failing somewhere new.
Coverage gaps designed into the layout cannot be closed by pressure or by run time.
New beds, a pool, a patio or mature trees mean the property is no longer the one the system was drawn for.
How the work is held together
5
Property systems under one team: irrigation, drainage, grading, erosion, fencing
One
Point of contact from design through handoff and as-built
2 or 4
Seasonal inspections a year, depending on the maintenance plan
20%
Member savings on repairs for Full Season households
Questions
Most residential systems are trenched, wired, tested and programmed within a small number of working days once the utility locate has cleared. Lot size, hardscape sleeving and how much of the landscape is already in place move that number more than anything else. The design and locate steps ahead of it are what set the start date.
Irrigation installation in Texas is regulated work and most cities in this area require a permit, an irrigation plan and a licensed irrigator. We handle the permitting and the plan submission, and the backflow assembly is installed to the class your city requires for the water source on your property.
Trenching leaves visible lines for a few weeks and then knits back in. On established turf we keep trench widths tight, keep spoil on boards or tarps, and backfill and compact in a way that avoids the settled troughs you see across badly installed lawns. It is disruption, not destruction, and we will show you the routes before we start.
Zone count is set by available flow, not by lot size. The gallons per minute your meter and service line can deliver decides how many heads can run at once; the plant types and exposures on the property decide how those heads are grouped. A large lot with strong flow can need fewer zones than a smaller one with weak flow.
Yes, and it is most of what we do. It changes the method rather than the design: more hand work around root plates and existing beds, sleeves bored under hardscape that is already poured, and head placement worked around mature planting so arcs are not blocked the day they are set.
Drip, in nearly every case. Inline dripline puts water at the root zone instead of on foliage and mulch, loses almost nothing to wind and evaporation, and does not throw water onto walls, fences or windows. It needs a filter and a pressure regulator on its zone, which is why beds get their own valve rather than being tacked onto a turf zone.
A weather-based controller earns its place here because the North Texas season swings so hard between March and August. It adjusts run times against local conditions, supports cycle-and-soak so clay actually absorbs what is applied, and lets a zone be shut off from a phone when something breaks. It is not a substitute for correct zoning, and it will not rescue a bad design.
A programmed, tested system, a walkthrough of every zone with you present, and a written as-built: the station map, manifold locations, head and nozzle types, and sleeve locations. That document is what makes the system serviceable years later, by us or by anyone else.
Start the design
We measure pressure and flow at the meter, walk the property, and talk through what the landscape is going to be — not just what it is today. The design follows from that.
Request an irrigation design visit
Tell us about the property. We will bring a gauge and a plan sheet.
A Sunday specialist will reach out to schedule your assessment and walk the property with you. If it’s urgent, call (817) 320-0028.
Next step
Pressure, flow, soil and exposure first. The zone plan follows from those, and the price follows from the plan.

Seasonal service
Each fall Sunday adds lighting to the work we already do on your property — permanent architectural systems that stay on the roofline year-round, and seasonal holiday installs we hang, service and take down for you.
All lighting installations booked before November 1. Design and quote at no charge.
Discount applies to new lighting installations scheduled between September and January. Ask us about bundling with a maintenance plan.